Repair: Minolta MD Rokkor-X 45mm f/2
This article documents the process of disassembling a Minolta MD Rokkor-X 45mm f/2 lens.
You may find it useful for cleaning the internal surfaces of the lens, but you will only be able to reach the surfaces adjacent to the aperture. The elements in both front and rear cells are sealed, and are not designed to be further removed. This could be attributed to cost-reduction, but I like the logical sequence in assembly.
You are responsible for your lens. You should wear gloves, and work in a clean environment.
You will need the following tools:
- Rubber lens opening tool, or lens spanner
- Philips #0 screwdriver

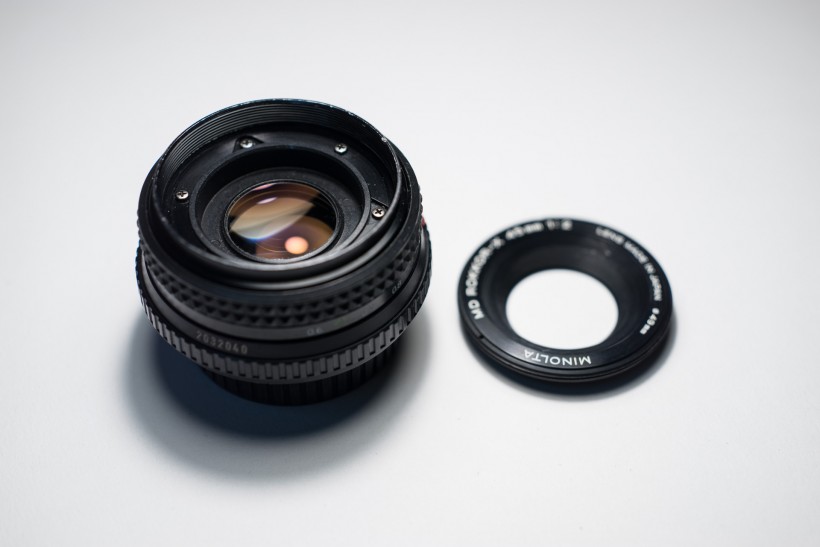
This is the lens. Remove the front nameplate ring using a rubber tool, or a lens spanner.
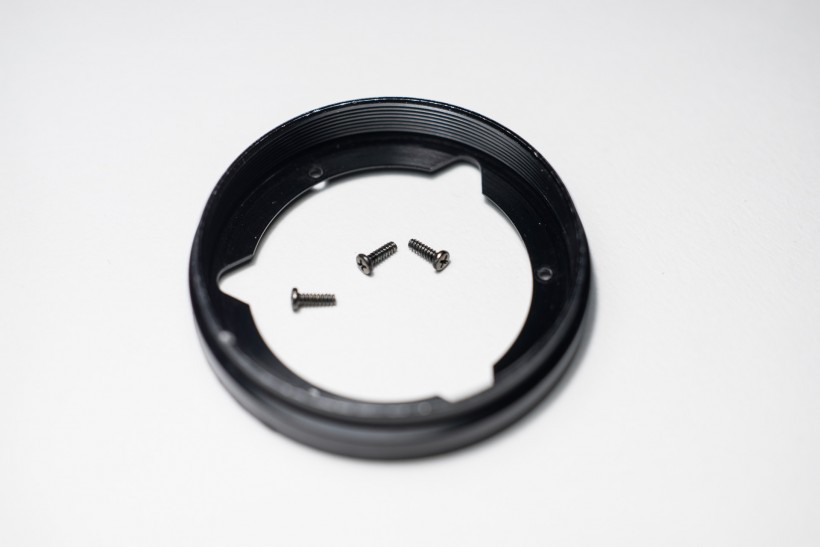
This exposes six screws.

Remove the screws that are not in the triangular cutouts (in the picture, they are at 9-, 1-, and 5 o'clock). They are partially removed in the picture.
Lift out the barrel and set the screws aside.
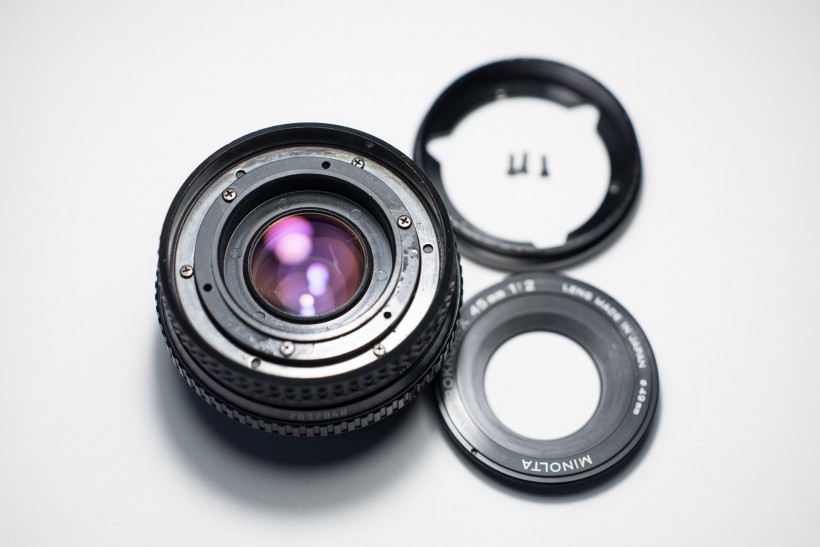
Remove the remaining three screws surrounding the front lens cell. You can lift the lens cell out, if it's stuck, tap the lens lightly to dislodge the cell.
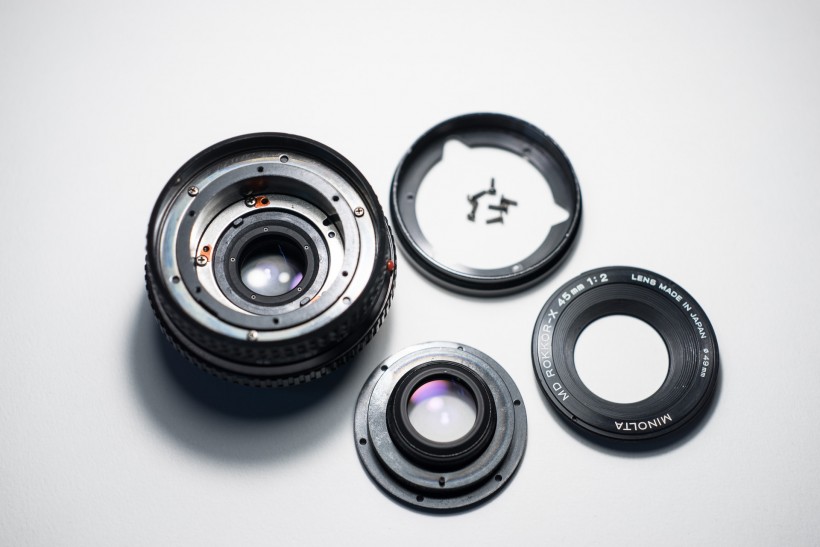
Here are all the parts that can be removed to access the inner glass surfaces.
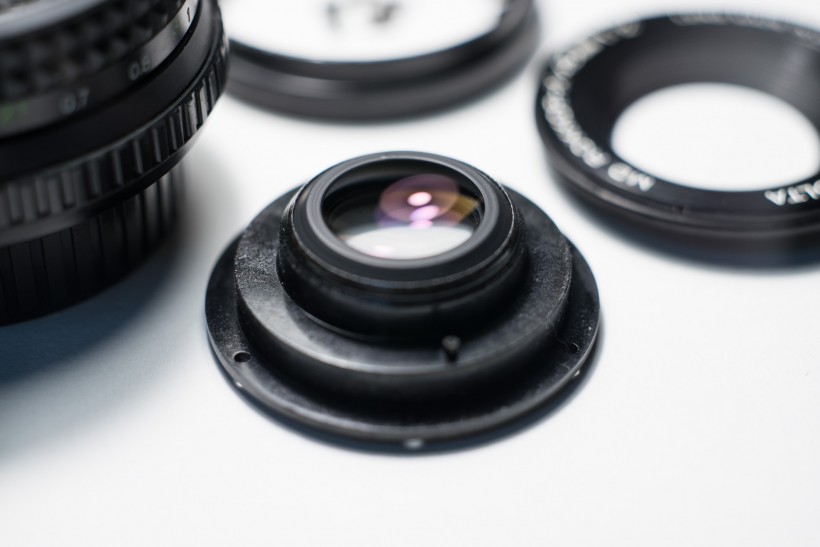
This is the front lens cell. As mentioned above, no further disassembly should be attempted.
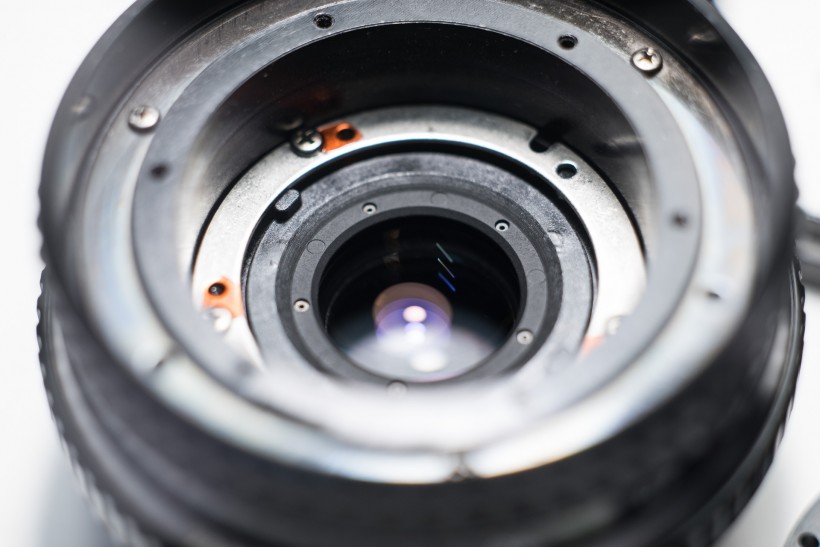
This is the aperture mechanism, and the exposed element of the rear lens cell. Try not to touch the aperture blades.
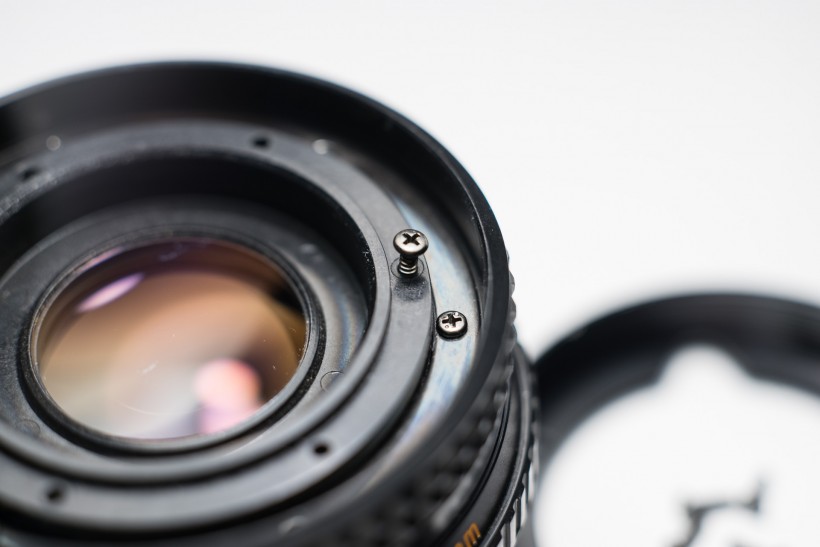
When reassembling, note that the screws holding the lens cell should be screwed into the holes with the slight depression.
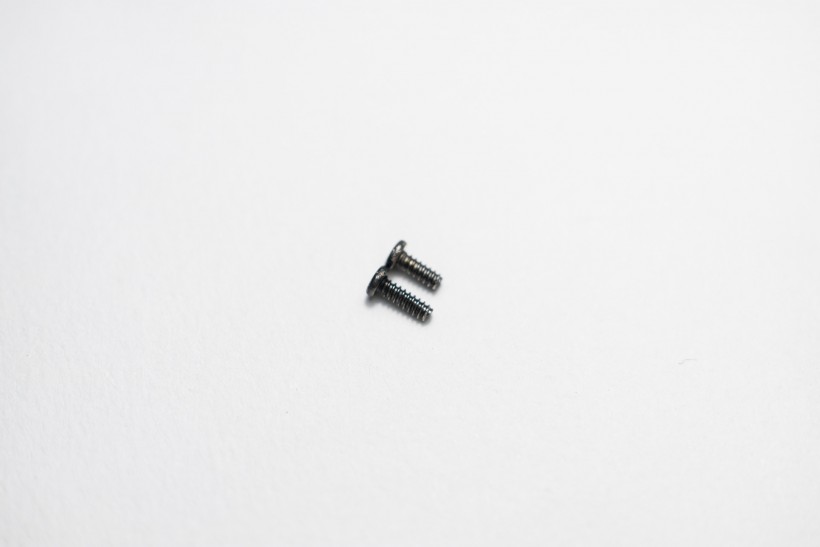
Also note that the screws removed have different lengths. The screws for the lens cell are shorter. The screws for the barrel are longer.